Introduction Link to heading
In this article, we will use Keycloak and OAuth2 Proxy to secure a web application running on Kubernetes.
first of all please check the pre-required list:
- A Kubernetes cluster
- kubectl
- helm
- A domain name
- A Keycloak instance
To install Keycloak on Kubernetes using Helm, follow these steps:
-
Add the Keycloak Helm repository: First, you need to add the Keycloak Helm repository to your Helm client. Run the following command:
helm repo add codecentric https://codecentric.github.io/helm-charts -
Update your Helm repository: To ensure you have the latest version of the Keycloak chart, update your Helm repositories:
helm repo update -
Install Keycloak: Now, you can install Keycloak using the Helm chart. You can customize the installation by creating a
values.yamlfile or by setting values directly on the command line. For a basic setup, run:helm install keycloak codecentric/keycloakIf you need to customize your installation, for example, setting a specific admin username and password, you can do so by adding
--setparameters:helm install keycloak codecentric/keycloak --set keycloak.username=admin --set keycloak.password=admin123For more advanced configurations, it’s recommended to use a
values.yamlfile:helm install keycloak codecentric/keycloak -f values.yaml -
Access Keycloak: After the installation is complete, Keycloak can be accessed through the Kubernetes service. To get the external IP address or hostname, use:
kubectl get svcLook for the
keycloakservice, and use the external IP or hostname to access Keycloak’s web interface. -
Post-installation configuration: Once Keycloak is up and running, you can access its web interface to create realms, clients, and users. Refer to the official Keycloak documentation for detailed instructions on post-installation configuration.
By following these steps, you will have a Keycloak instance running on your Kubernetes cluster, ready to secure your web applications.
To enhance the security of your web applications further, you can install oauth2-proxy using a Helm chart on Kubernetes. This proxy will work alongside Keycloak to authenticate and authorize users accessing your applications. Follow these steps to install oauth2-proxy:
-
Add the oauth2-proxy Helm repository: To get started, add the
oauth2-proxyHelm repository to your Helm client with the following command:helm repo add oauth2-proxy https://oauth2-proxy.github.io/manifests -
Update your Helm repository: Ensure you have the latest version of the
oauth2-proxychart by updating your Helm repositories:helm repo update -
Install oauth2-proxy: You can now install
oauth2-proxyusing the Helm chart. Similar to Keycloak, you can customize the installation by creating avalues.yamlfile or by setting values directly on the command line. For a basic setup, run:helm install oauth2-proxy oauth2-proxy/oauth2-proxyTo customize your installation, such as setting up the provider, client ID, and client secret, you can use the
--setparameters. Here’s an example for setting upoauth2-proxywith Google as the provider:helm install oauth2-proxy oauth2-proxy/oauth2-proxy --set config.provider=google --set extraArgs.client-id=YOUR_CLIENT_ID --set extraArgs.client-secret=YOUR_CLIENT_SECRETFor more detailed configurations, it’s recommended to use a
values.yamlfile:helm install oauth2-proxy oauth2-proxy/oauth2-proxy -f values.yaml -
Configure DNS and Ingress: After the installation, you’ll need to configure DNS and Ingress to route traffic through
oauth2-proxyto your application. This step varies based on your Kubernetes setup and the domain provider you’re using.
By following these steps, you will have oauth2-proxy installed and configured in your Kubernetes cluster, working in tandem with Keycloak to secure your web applications.
To demonstrate the security features provided by Keycloak and oauth2-proxy, we will deploy a simple web application called http-echo on Kubernetes. This application will echo back any request made to it, making it a perfect candidate for our demonstration. Follow these steps to install http-echo:
-
Create a Deployment for http-echo: First, we need to create a Kubernetes Deployment that runs
http-echo. Save the following YAML to a file namedhttp-echo-deployment.yaml:apiVersion: apps/v1 kind: Deployment metadata: name: http-echo labels: app: http-echo spec: replicas: 1 selector: matchLabels: app: http-echo template: metadata: labels: app: http-echo spec: containers: - name: http-echo image: hashicorp/http-echo args: - "-text=Hello from http-echo" ports: - containerPort: 5678Deploy it to your Kubernetes cluster with the command:
kubectl apply -f http-echo-deployment.yaml -
Expose http-echo using a Service: Next, we need to expose the
http-echoDeployment using a Kubernetes Service. Save the following YAML to a file namedhttp-echo-service.yaml:apiVersion: v1 kind: Service metadata: name: http-echo spec: selector: app: http-echo ports: - protocol: TCP port: 80 targetPort: 5678Apply it with the command:
kubectl apply -f http-echo-service.yaml -
Create an Ingress to access http-echo: Finally, to make
http-echoaccessible from outside the Kubernetes cluster, we need to create an Ingress. Note that you should have an Ingress controller running in your cluster. Save the following YAML to a file namedhttp-echo-ingress.yaml:apiVersion: networking.k8s.io/v1 kind: Ingress metadata: name: http-echo spec: rules: - http: paths: - path: /echo pathType: Prefix backend: service: name: http-echo port: number: 80Apply it with the command:
kubectl apply -f http-echo-ingress.yaml
By following these steps, you will have deployed the http-echo application on your Kubernetes cluster. You can now access it through the Ingress path /echo to see the echoed message.
To secure the http-echo service using oauth2-proxy as an authentication proxy, you need to add specific annotations to the Ingress resource. These annotations will direct traffic through the oauth2-proxy, which in turn will handle authentication with Keycloak before forwarding requests to the http-echo service. Update your http-echo-ingress.yaml file with the following annotations:
   apiVersion: networking.k8s.io/v1
   kind: Ingress
   metadata:
     name: http-echo
   annotations:
     nginx.ingress.kubernetes.io/auth-url: "https://<your-oauth2-proxy-host>/oauth2/auth"
     nginx.ingress.kubernetes.io/auth-signin: "https://<your-oauth2-proxy-host>/oauth2/start?rd=$escaped_request_uri"
     nginx.ingress.kubernetes.io/proxy-buffer-size: 512k
   spec:
     tls:
     - hosts:
       - <your-http-echo-host>
       secretName: <your-http-echo-host>-tls
     rules:
     - host: https://<your-http-echo-host>
       http:
         paths:
         - path: /echo
           pathType: Prefix
           backend:
             service:
               name: http-echo
               port:
                 number: 80
To configure the oauth2-proxy to work with Keycloak, you need to edit the values.yaml file used for deploying oauth2-proxy. This configuration will ensure that oauth2-proxy correctly redirects and authenticates users with your Keycloak instance. Below are the necessary configurations:
config:
  provider: "keycloak-oidc"
  clientID: "YOUR_CLIENT_ID"
  clientSecret: "YOUR_CLIENT_SECRET"
  cookieSecret: "YOUR_COOKIE_SECRET"
  emailDomains: "*"
  upstreams: "http://<your-http-echo-internal-dns,something like 'http-echo.namespace.svc.cluster.local:80'>/"
  provider_display_name: "Keycloak"
  redirect_url: "https://<your-oauth2-proxy-host>/oauth2/callback"
  oidc_issuer_url: "https://<your-keycloak-host>//realms/<your-keycloak-realm>"
  insecure_oidc_allow_unverified_email: "true"
  pass_access_token: true
  pass_authorization_header: true
  pass_host_header: true
  pass_user_headers: true
To configure Keycloak for securing your web application, follow these steps:
-
Create a Realm:
- Log in to the Keycloak Admin Console.
- In the left-hand menu, click on
Add realm. - In the
Namefield, enterhttp-echoand clickCreate.
-
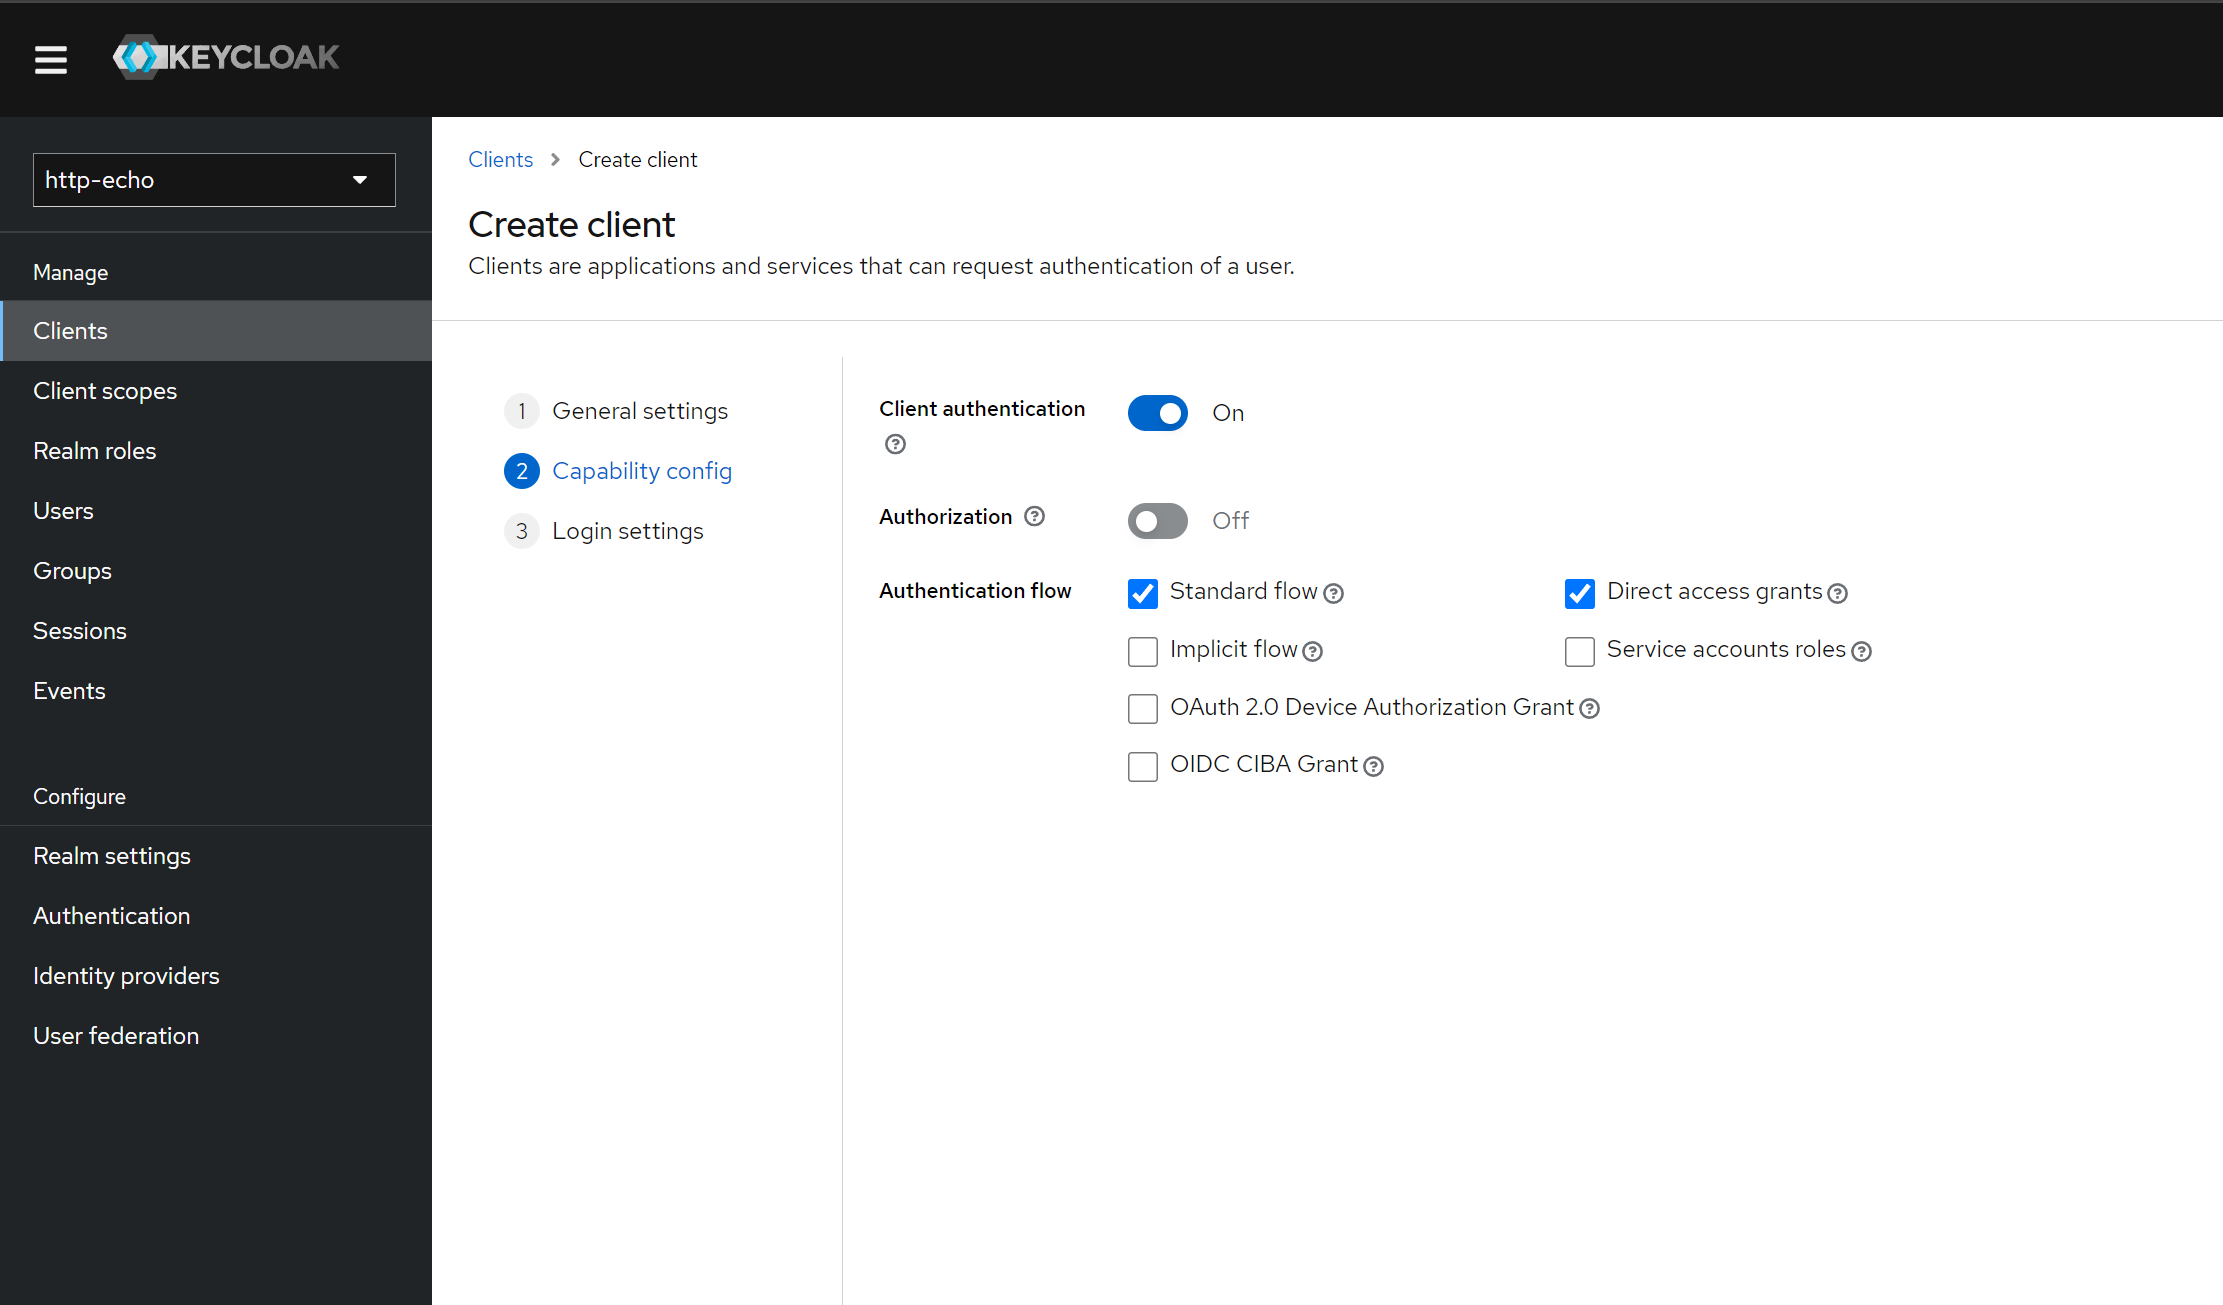
Create a Client:
- Within the
http-echorealm, click onClientsin the left-hand menu. - Click on
Create. - In the
Client IDfield, enterhttp-echo-web. - Set
Client Protocoltoopenid-connect. - Click
Save. - On the
Settingstab for the new client, setClient AuthenticationtoON. - Scroll down to the
Valid Redirect URIsfield and addhttps://<your-oauth2-proxy-host>/oauth2/callback. - Click
Saveat the bottom of the page.
- Within the
then do not forget update the configuration of oauth2-proxy with the clientID and clientSecret of the client you just created in Keycloak.
By completing these steps, you have configured Keycloak with a new realm and client suitable for securing your web application through oauth2-proxy.